Tilly and the Buttons: Eden Coat
- SewCreative

- Dec 4, 2020
- 6 min read

Tilly and the Buttons are well known for their beginner-friendly, easy to follow instructions and universally flattering patterns. When we first saw the Eden coat, we thought that it might be a bit of a departure for them. As their first outerwear pattern, it seemed like it might be a little difficult, especially for beginner sewers. When Alex made her first version, a red raincoat (a-la Joules) it became clear that it was the kind of coat that anyone could make, as long as they had a little garment sewing under their belt. There are a few features that make the Eden coat a good way to dip your toe into the coat-making world:
Raglan sleeves
The raglan sleeves in this pattern mean that there is no complex tailoring techniques or knowledge needed for setting in sleeves and sleeve heads. They give a more casual vibe than a traditionally tailored coat, but for the coat styles included in the pattern, it really works and cuts out a lot of the hard work.
Hem facing
One of the challenges when sewing a coat with a full lining, is getting the hem to be crisp and even with no pulling or puffiness. This is partially solved in the Eden by a separate hem facing, this is attached to the lining which allows for an even hem, the main coat and lining are also secured together at the neckline, avoiding pulling and sagging.
Collarless
The raincoat and duffle coat styles included in the Eden pattern have a hood and a high collar. Not only are these great for the wet and windy weather we get in the UK, but also mean that there are no collars or collar stands to contend with. It also gives a great opportunity to add fur trim to the hood for an on-trend look.

Things to look out for...
There are a few thing in the pattern instructions that we think could be a little clearer. First up is the facings on the front of the coat. The instructions are well written and explain it well, however they don’t match up with the photographs. When you are cutting out the facings, pay close attention to the directions on the pattern pieces. You will need to cut the facing piece on the WRONG side of the fabric, with the pattern piece facing up. This goes for the front coat (left and right) pieces as well. If you don’t follow these instructions, you will either find that your pieces won’t go together, or the instructions will be confusing as your coat will be fastening back to front!
The second thing to be mindful of is that all of the instructions use the same raincoat fabric for the photographs and whilst they differentiate between the various styles in the written instructions, it can be difficult to see where these changes occur. We recommend carefully reading and highlighting the relevant sections before you start cutting and sewing.
Fabric Choices
Raincoat For the raincoat version, waterproof fabrics make the best choices. These come in a variety of types, but are usually either waxed cotton, laminated cotton or ripstop. For a lighter summer jacket, why not try a cotton canvas or drill? We've chosen some of our favourites for the raincoat option.


For the lining on the raincoat, using a jersey or brushed fabric makes even waterproof fabrics feel cosy and warm. it's also a great opportunity to use a jazzy fabric that you might not wear otherwise. You can also keep it simple and classy with a plain jersey.


L-R: Black Polka Dot Viscose Jersey; Hi Fives Cotton Jersey; Mulberry Viscose Jersey; Postbox Red Viscose Stripe Jersey; Grey French Terry Viscose Jersey; Navy Leopard Foil Cotton Jersey
Duffle coat
For the woollen duffle coat, there are a brilliant range of coat fabrics out there to choose from. You can use either a pure wool or a blend, depending on budget and preferences.


Notions
Zips
The pattern instructions call for a 50 - 72cm long open ended zip, depending on the version you are making. We would recommend choosing the longest zip for your version, unless you are making the smallest sizes (1 or 2). This means that your coat will close all the way up and will hang nicely. We also recommend choosing a metal zip as they are much more durable than their plastic counterparts. As this pattern doesn’t involve sewing over the zipper at any point it is safe and easy to use a mental zip.
Toggles
When Alex made the duffle coat version, we found it really tricky to find good quality toggles. There are lots of PVC options available online, but these are not always long lasting and can cheapen the look of the coat. If you can buy them in person, then you might get lucky with PVC ones, but otherwise we recommend suede or leather toggles. Tilly recommends making your own from cord and toggle buttons and this is certainly an option, but is unlikely to last for the life of your coat. We have included some links to some toggles that we found, as well as to the ones that Alex used on her coat.


Poppers
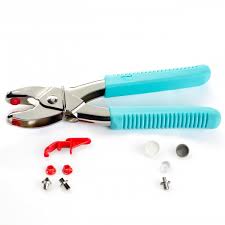
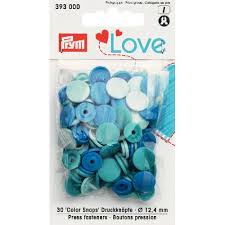
Tilly recommends sew-on poppers for the hood and centre closure, as well as for the pockets. Alex used these on her first raincoat and they work well, although they were difficult to sew on (get a thimble!). For Kate’s raincoat and Alex’s duffle coat, we used no-sew poppers. These come in a kit and are applied using the Prym Variopliers. They can be tricky to start with, but once you get the hang of it, you’ll be poppering everything you make!


Making the woollen version
Alex decided to make the duffle coat version of Eden in our Ex-Designer Organic Black Wool. She chose the long version and added both a zip and duffle closures to the front. She also chose a beautiful teal lining from her stash to brighten the whole thing up. She chose to interline her coat for an extra layer of warmth.
Some important things to remember when sewing with wool are:
When pressing wool, use a press cloth to avoid the fabric from becoming shiny.
Use lots of steam to set seams and hems in place.
Natural wool can stretch when sewing, so stabilise bias edges (such as neck edges) with a stay stitch.


Making the raincoat version
Sewing with waterproof fabric can be tricky but there are a few tricks that can make it easier. For most waterproof fabrics, using pins will leave permanent holes in the fabric which will be visible when the coat is finished. To secure pieces together whilst sewing, we recommend sewing clips, also known as Wonder Clips. These small clips won't damage the fabric and will keep everything waterproof! For securing pockets in place for topstitching, use low-tack tape such as Washi.
If you find that your fabric sticks to the machine a little when sewing, try using a teflon presser foot. These allow the fabric to slide more easily through the machine. If you find that your machine is still not stitching evenly, try using a microfibre needle, as it’s finer, sharper point will pierce cleanly through the fabric.
Kate used our Blush Raincoat fabric to sew up her super girly Eden raincoat. She lined it in our cerise gingham and added matching pink poppers! To make sewing easier, she used some of the techniques we have discussed such as a microfibre needle.


Taking it to the next level
If you choose a thinner coating wool, or just fancy a super warm and cosy coat, we recommend interlining your coat. This is the process of adding an insulating layer between the main fabric and the lining. This can be a range of materials but is most commonly either flannel or thinsulate. Thinsulate is a branded fabric that can be difficult to find in the UK, but we have found that ProFabrics is a good supplier. If thinsulate seems like a bit much, a brushed cotton or flannel adds just enough weight to keep you warm.
When cutting out the interlining, cut it to match the LINING pieces and not the main outer pieces. Once you've done this, trim 0.5cm from all edges of the interlining to reduce bulk in the seams. You can then mount the interlining to the wrong side of the lining with a long basting stitch. Simply sew the lining together as instructed, treating the lining and interlining as one piece.
Raincoat, canvas or wool - what will you choose? We can't wait to see your Eden makes!
Happy Sewing, the Sew Creative Team x


Comments